


Using the Bobbin Clamp. Screw in the screw maybe three or four revolutions into the Pickup Wheel and then tighten the Thumb Nut down on the plastic piece to hold the bobbin onto the Pickup Wheel. You can also use double sided tape and try to get the bobbin centered as well as possible, it’s not really critical to get it perfect.
119.00$
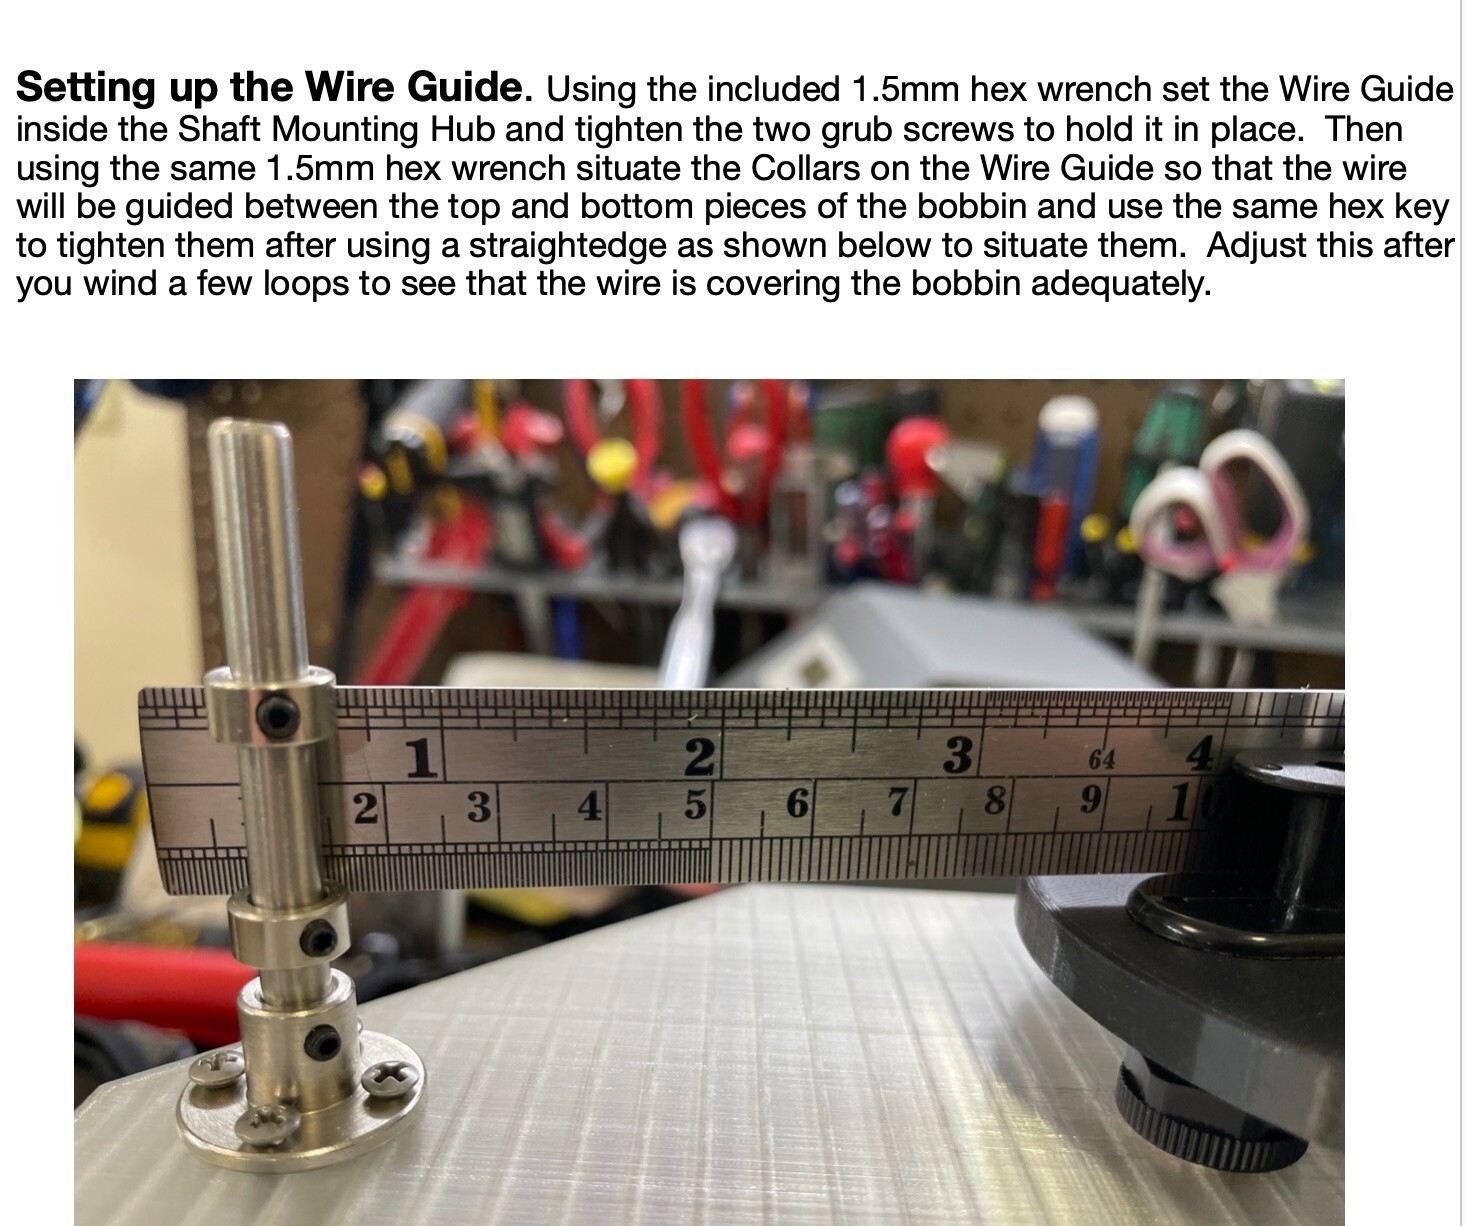
1. Setting up the Wire Guide.Using the included 1.5mm hex wrench set the Wire Guide inside the Shaft Mounting Hub and tighten the two grub screws to hold it in place. Then using the same 1.5mm hex wrench situate the Collars on the Wire Guide so that the wire will be guided between the top and bottom pieces of the bobbin and use the same hex key to tighten them after using a straightedge as shown below to situate them. Adjust this after you wind a few loops to see that the wire is covering the bobbin adequately.
2. Using the Bobbin Clamp. If you’re using the Bobbin Clamp method instead of the double stick tape to secure the bobbin to the Pickup Wheel put the Thumb Nut on the screw with the small diameter part facing the bottom of the screw, then put on the Plastic Clamp with the flat part towards the top of the screw. Then put it through the hole in the middle of the Pickup Bobbin (if it has a hole, some bobbins don’t). Screw in the screw maybe three or four revolutions into the Pickup Wheel and then tighten the Thumb Nut down on the plastic piece to hold the bobbin onto the Pickup Wheel. You can also use double sided tape and try to get the bobbin centered as well as possible, it’s not really critical to get it perfect.
3. Front panel button operation. Put the Directional Rocker Switch on the front panel in either the top or bottom position to get the Pickup Wheel to revolve either clockwise or counter clockwise. Either way will work. The middle position is off so if you’re not getting any motor shaft movement check that! The knob on the left of the front panel controls the speed of the Pickup Wheel.
4. The Digital Counter. To turn on the counter push the left button until you see digits. To turn if off hold the button in until you see it is off. The Counter Reset button is on the right to reset the counter to zero to start a new wind. There is a AA battery in it that may need changed which is easily accessible from the bottom.
If you have any questions just message me! Thanks again!
| Brand | Unbranded |
| Type | pickup |
0 Comment
Leave Comment